

ACParadise Network:
American Cosplay Paradise
American Cosplay Experience
American Cosplay Snapshots
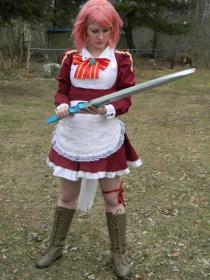
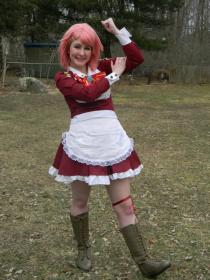
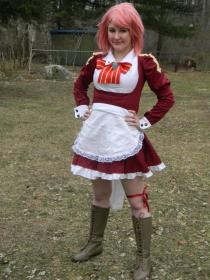
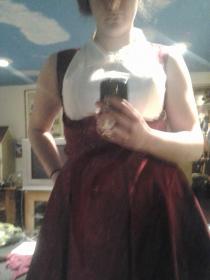
Cosplayer Fancy_Duckie > Costume of Lisbeth (Sword Art Online)
- Most Recent Photo
- 08-12-2014
- Series
- Sword Art Online
- Character
- Lisbeth
- Special Variation:
- Default Dress
- Year Completed:
- 2013
- Construction Difficulty:
- Normal
- Costume worn at:
- Anime Boston 2014
This Costume has been retired

About this Costume
- Construction Details:
-
I used cotton sateen for the jumper and the blouse, and casa satin for the ruffle trim on the skirt. I made the blouse using the bodice of a simplicity dress pattern and free-handed the collar, sewed it to some bias tape and sewed it to the top. I only made the blouse to about waist length (and sleeveless) since I was concerned about overheating in this. The top part of the jumper was free-hand patterned. Basically, I held up the fabric over my chest and had Alex draw around and under my bust with tailor's chalk to get the open part, and then I used a tank top as a pattern for the shoulder parts. I measured the length from just under my bust to where I wanted the skirt to fall, made it into a rectangle, picked the side I liked best, and cut it out on the fold. The back part I used a tank top as a quasi-pattern again. I free-handed the sleeves, which are in two parts; the poof part I gave myself an extra few inches on the top and bottom so I could do some pleats. The bottom part is literally just a rectangle sewed to the top part of the sleeves. The cuffs I measured out as rectangles, hemmed them, and then sewed them onto the sleeves and made an extra seam for the sticky-outy part. I found some really cute buttons that I used for them, and used smaller and flatter versions of them on the collar. I cut out the arrows from some leftover casa satin from my Mami cosplay and we fabric glued them on. For next year, these are just getting baste-stitched and fray checked like crazy! The skirt was a circle skirt that I patterned myself and pleated by hand. It's trimmed with a ruffle made from casa satin that desperately needs some fray check on top. The apron was a little bit weird. Originally, I used some pi skills to make it a half circle because it seems pretty wide in the front (and comes up almost to her back in reference art), but it was sitting weird on me, so I made it a bit smaller so it would look ok. Lesson learned: animu clothes do not follow IRL clothing construction rules. I trimmed this with some lace even though it looks like more ruffles in the anime because I really like lace and thought it would look cute. The pockets I used my phone as a pattern for since I wanted them to actually be functional. The ribbon I made out of 4" red casa ribbon and fabric glued the narrower yellow ribbons to it. I cut out a piece for the top part of the bow and glued the two ends in the back, then I cut two more pieces for the tails and glued them at an angle in the back, then squished it and glued it in place, and hand sewed the "knot" out of a narrower piece of ribbon, and safety pinned this to the blouse. The brooch is cast from resin and was painted blue, the backing is craft foam painted silver, and a hotglued safety pin lets me attach it to the ribbon. The buttbow I just patterned out a rectangle, and sewed it together in an interfacing-fabric sandwich. Last year, I wanted to do armored Lisbeth, which is why the tails are long, but I'm not sure whether or not I want to change it to be more accurate or not.
- Personal Thoughts:
- YAY I HAVE POCKETS! I also look surprisingly cute with freckles.
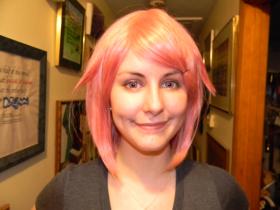
Wig Details
- Styling Notes
- Just had to cut the bangs, trim the ends a little bit, and make the little flippy-outty parts at the top, lol.
- Wig Review
- I really wish the top didn't come crimped, but this is really comfy and such a pretty color!!
Add a Comment


-
 282656 Visitors
 -
- Cosplayer Info
- Costumes Worn
- Costumes Made
- Props
- Wigs
- Favorites
- Videos
- Convention History


Sorry, you must be a registered user of and logged in to view and add comments. Either log in or register now!