

ACParadise Network:
American Cosplay Paradise
American Cosplay Experience
American Cosplay Snapshots
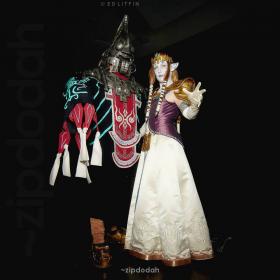
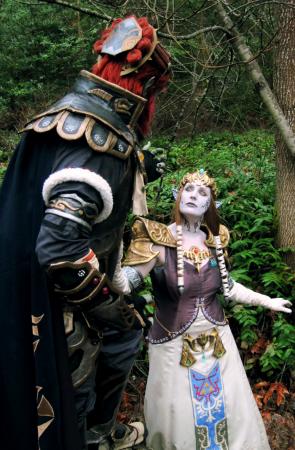
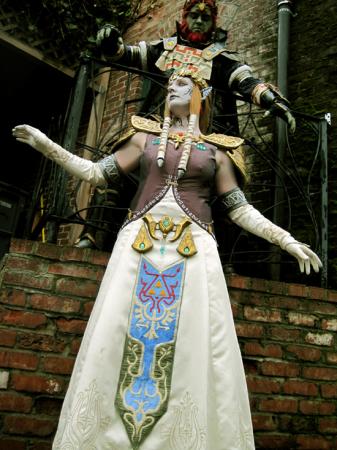
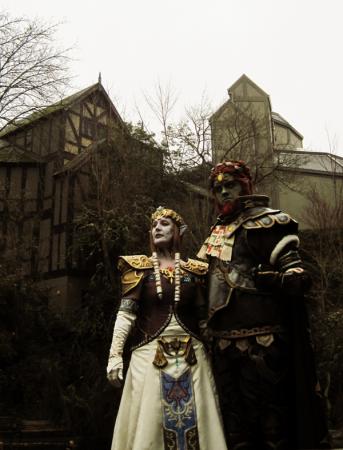
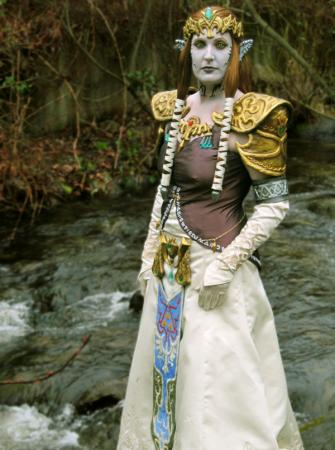
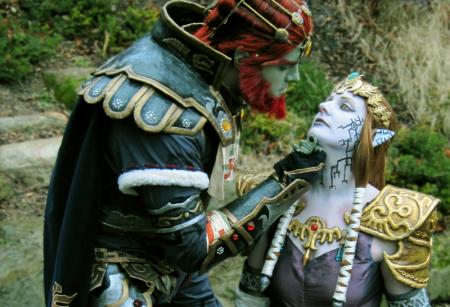
Cosplayer Seifer-sama > Costume of Princess Zelda (Legend of Zelda: Twilight Princess)
- Most Recent Photo
- 04-04-2014
- Series
- Legend of Zelda: Twilight Princess
- Character
- Princess Zelda
- Special Variation:
- Ganondorf's Puppet
- Year Completed:
- 2010
- Construction Difficulty:
- Difficult
- Costume worn at:
- Anime Expo 2014
- Anime Expo 2010
- FanimeCon 2011
- Sac-Anime Winter 2014
- Sac-Anime Winter 2011
- Sakura-con 2013

About this Costume
- Construction Details:
-
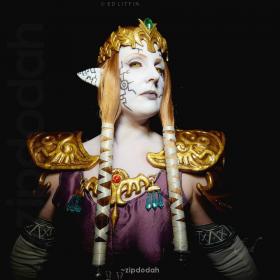
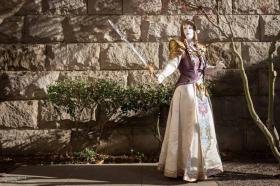
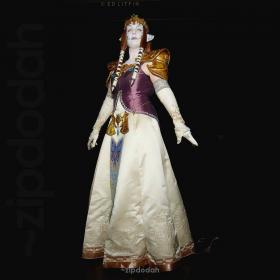
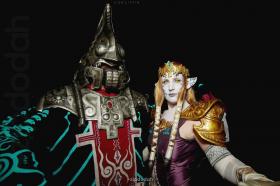
I was so happy to be able to try this out at Anime Expo! I wasn't sure I was going to be able to pull it off, but I was pleasantly surprised. rnrnThe makeup is all Ben Nye products and took about two hours worth of painting. I even helped! (I did the eyes). The ears I made myself by making a mold of my own ear and then building a new one with clay. I then covered the clay in latex and once dried, I had my own custom fitting latex ears. I painted over the latex to continue the black design and to match the color of my makeup.rnrnThe dress is a pattern I put together myself and is made from an ivory dutchess satin fabric. The top is made out of a purple taffeta and was embroidered by hand. The designs on the dress and gloves were all machine embroidered. I drew the designs, scanned them into the computer, and let the machine do the rest. I spent hours and hours pinning and sewing those gold ribbons on the bottom of the dress, then afterward I learned of an easier way to go about that, which will be used next time I guess. There were a number of "minor setbacks" but I am very pleased with the costume and I feel as though I learned a lot, so I suppose it's worth it.rnrnThe front panel is a silk taffeta. After reading a few tutorials about ombre dyeing I decided to give it a shot and was pleased with my first attempt. I spent two months embroidering the panel designs by hand. I did attempt to machine embroider the panel at first, but the machine was having difficulty with such a large design, so I eventually gave in and did it by hand.rnrnThe armor was crafted with fun foam and then Wonderflex was added over the foam. The crown has been redone. I made the base out of fun foam and added a layer of wonderflex over the foam. I then used model magic to create the small details on the front and on the leaves. This new crown was much easier to make and lighter than the last two I have made. On the rest of the armor I used Friendly Plastic to cover over the cheesecloth texture of the wonderflex. It took me a few hours to get the armor to where I was happy with it, but I am pleased with the end result. I doubt I would ever use Friendly plastic on something so detailed again, it was not as "friendly" as described in my opinion.rnrnThe jewels were all made of resin (except the drop prisms, I bought those). I think the resin part of this costume was the easiest... Measure, mix, pour, wait, pop out of the mold, how simple. :) The prism gem for the crown was probably the most complex gem to make. I sculpted the prism shape from paperclay and a mold was made from the sculpture for the resin.rnrnThe final task was figuring out how to attach all of the armor pieces, the most difficult being the pauldrons (which seems to be where most people struggle).rnrnUpdate: Finally made the sword and finished the cloak. The cloak is a black moleskin with grey moleskin appliqued on. The smaller sections like the hourglasses were just done with a zigzag stitch. The scarf is a crepe back satin with gold satin appliques. rnrnUpdate: Modifications to the dress have been completed! The skirt has been completely redone. I used a Adore Duchess satin (ivory), made eight huge panels and eight pleats so I could finally get the look of the dress right. The pleats took forever to set right, there was so much fabric! Each harp design was stitched on with a zigzag stitch and the trim and chain link patterns were done with applique. I also redid the gloves, they are now a spandex with the design appliqued on. I also refitted the bodice so it sits much better now and turned it from a pullover to a zipper. Photos soon to come!!rnrnSlight Update: Spent some time giving the armor a new paint job which will hopefully help the designs pop more. I hope to have photos soon.
Wig Details
- Wig Brand
- New Look
- Wig Name
- Godiva 951 XL
- Wig Quality Rating
- 4 / 5.00
- Styling Notes
- I also redid the wig again... I like the new color, I think it looks more natural for my skin tone. Rather than extensions like the last wig, I decided on foam inserts for the thick braid pieces. This was so much easier to work with and it makes the wig a lot lighter than it was. (Thank goodness!)
Add a Comment
-
 316824 Visitors
 -
- Cosplayer Info
- Costumes Worn
- Costumes Made
- Props
- Wigs
- Favorites
- Videos
- Convention History


Sorry, you must be a registered user of and logged in to view and add comments. Either log in or register now!