

ACParadise Network:
American Cosplay Paradise
American Cosplay Experience
American Cosplay Snapshots
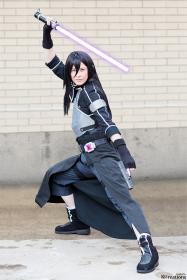
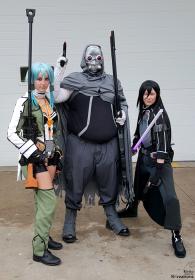
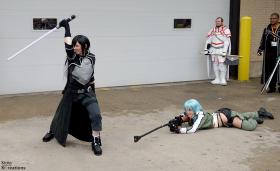
Cosplayer Naoi > Costume of Kirito (Sword Art Online)
- Most Recent Photo
- 05-31-2015
- Series
- Sword Art Online
- Character
- Kirito
- Special Variation:
- Gun Gale Online - Anime
- Year Completed:
- 2015
- Construction Difficulty:
- Difficult
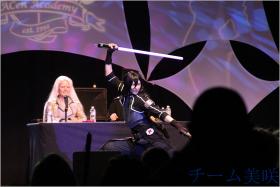
- Awards
- ACen 2015 Novice Craftsmanship Award
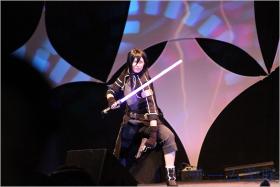
- Costume worn at:
- Anime Central 2015
- Anime Iowa 2015
- Anime NebrasKon 2015
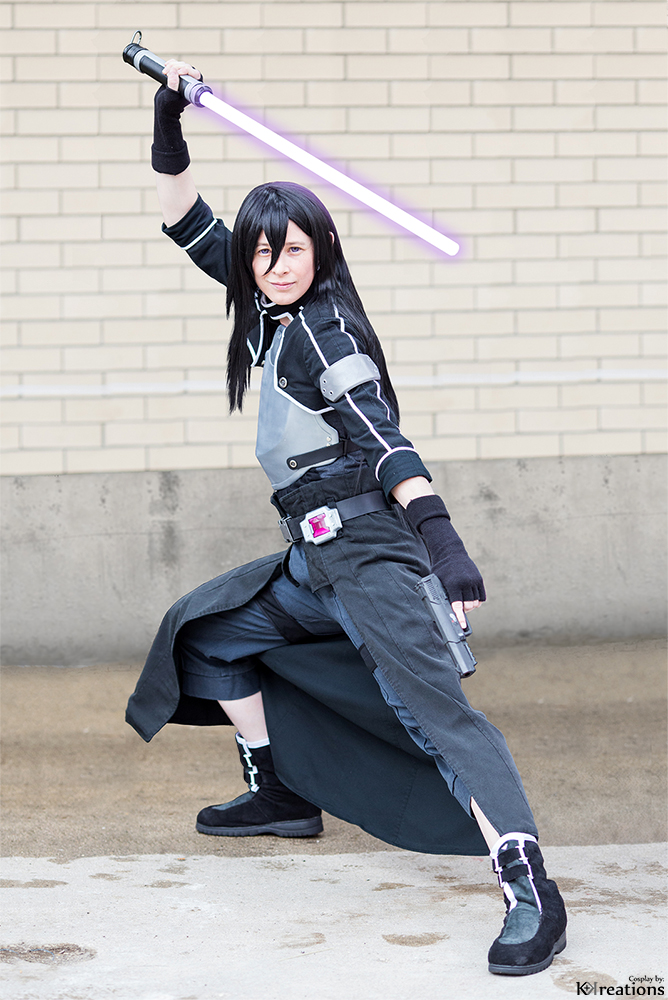
About this Costume
- Construction Details:
-
So this costume was retailored from my Light Novel version last year so some of the construction details will be the same. There was a lot of designing and patterning that went into the pieces for this costume. rnrnThe first piece was the jacket. I found a pattern that was similar to the shape and style I wanted, McCall's M6292, and cut it out of muslin to check the initial fit and lines. Since I added extra fabric to the muslin pieces I was able to redraw lines to get the shape for the front cutout framed correctly and cut the sleeves to length. For the actual fabric I used black cotton twill to give it the realism of military look and ruggedness. I added extra seaming down the sides of the sleeves to give some detail and fully lined the entire thing in black 100% Kona cotton with all seams finished. The binding was added around the entire outer edge of the jacket to finish the seams off so that they didn't need to be turned under and add bulk. There were also one side of a snap riveted on and covered with buttons which match the the breastplate and neck closure.rnrnFor the shirt under the jacket I purchased a dark grey V-neck and used black rayon jersey to create the over shirt which I stitched in place over the t-shirt to give the layered effect and made the cut out and turned the edge over with binding so it would hold its shape and attached the collar hand stitching on a snap for closure. rnrnThe pants were new for this version. I used a black canvas/denim that was already a little pre-faded and washed it a couple times to fade it a bit more to get the proper grey color. The original pattern I used was McCall's 5475 version C which I modified the waist to be higher and added pockets from another pattern. After I had everything together except for the waistband I realized that the pant legs were too wide so I had to take in the side seams and I added a seam down the front to give a crease detail. I also added tabs on the waistband for the belt that connects the pants and overskirt together. The bands around the pants were made of the same twill as the jacket with the binding around the edges and held in place with a system of snaps so they are removable. rnrnThe over skirt is a 4 panel A-line skirt adapted from a generic pattern with additional seams added down the center of each panel to give more detail. The over skirt is also lined in cotton with the same seaming and the seams were all pressed to the center and topstitched to stay in place and reduce thickness for when the pieces were sewing together and turned right side out. The front pieces were added and the top turned over and belt loops added on the inside so they could be attached to the pants by the belt to make it all one piece and so it wouldn't move when I sat or bent down. There were also belt loops added on the outside to keep the belt in place so it wouldn't ride up.rnrnThe boots were purchased rain boots that I cut the fabric uppers from and re-patterned with leather based on the anime design. The tongues of the boots were made from grey leather edged in white bias tape to give some contrast and there are black straps of the leather woven through strap adjusters for closure. On the inside there are buckles that keep the sides of the boots together and smaller buckles which keep the straps tucked in the sides.rnrnFor the breastplate I tried something different than modeling with clay like my previous version. I created the original out of worbla with foam in between the layers for extra strength and went through a multistep finishing process which smoothed the surface. Once that was done I used a liquid silicone with multiple layers to make a mold of the worbla breastplate. I then added a hard back shell with plaster strips to keep the silicone molds shape. The mold was then brushed with Smooth-On cast magic silver bullet powder and the Color Match resin tinted black was poured in the mold. I had to do multiple pourings of the resin that took a couple hours to build up the thickness and full coverage of the entire breastplate. When removed it gives the finish of bright metal. A strap was then added at the shoulders with adjusters and the other side of snaps were added to the front to keep the jacket connected to the breastplate. The bottom strap was made of leather which I added cuts along the edges for detail and used plastic sliders to make the strap follow the path that I wanted along the edge of the breastplate. The ends of the strap had a hook riveted on and button details sewed on which match the ones on the jacket. The eye side of the hook was screwed into the breastplate.rnrnThe arm shield was made in the same way as the breastplate, modeled with worbla and then molded with silicone and cast in resin mixed with aluminum powder which looks like metal once it is rubbed with steel wool. For the other accessories I used a similar process as the breastplate (minus the holster which was modeled in worbla alone) modeled a worbla base piece, molded with silicone and cast in resin. The gem for the optical shield was molded from a cut glass piece and cast in purple tinted resin which then had a piece of aluminum tape placed behind it to give the appearance that it was lit. I will be adding LEDs behind the gem to give an actual ‘lit’ appearance in the future once I get a new model printed from my friend's 3D printer.rnrnThe gun and light saber were purchased. The gun is an actual BlueGun replica of a real FN 5-7 cast in resin so it is completely inoperable but looks completely real! I also painted on some of the grey and red details and added an orange tip or safety. The lightsaber was purchased from UltraSabers and was covered in worbla to get the details.rnrnOverall thoughts is that this is one of the best Cosplays that I have put together with numerous hours and effort put into it, especially since it has spanned over a year of work, but I wouldn't change any of that time. There are still a few small details that I would like to fix, but overall I love it and it was gratifying to be recognized for my hard work with the ACen 2015 Novice Craftsmanship Award!
- Personal Thoughts:
- Very happy to have gotten this updated to the Anime version since my original Light Novel version was debuted two months before the anime was announce last year.rnrnI was also extremely happy and humbled to win the ACen 2015 Novice Craftsmanship Award in my first ever Masquerade! I will be getting more pics of this soon as I didn't get to wear it much at ACen.
Wig Details
- Wig Brand
- HelloCosplay
- Wig Name
- Medium
- Original Color:
- Black
- Styling Time
- 3 hours
- Wig Quality Rating
- 4 / 5.00
- Styling Notes
- Mostly I just tried to piece out the bangs based on the reference images and cut them to length and used pomade and Got2Be spike gel to keep the ends together. In order to make it look thinner and to keep it more manageable it took small sections to the sides of the bangs and tied them under the rest of the wig which made it look thinner on the back of the neck and kept it mostly behind me.
- Wig Review
- This was actually the first wig for Cosplay that I purchased and it was not as bad as I had thought that it would be. I did buy the conditioning spray the was recommended and the wig still tangles, but that's to be expected with long ones.
Add a Comment


Sorry, you must be a registered user of and logged in to view and add comments. Either log in or register now!