

ACParadise Network:
American Cosplay Paradise
American Cosplay Experience
American Cosplay Snapshots
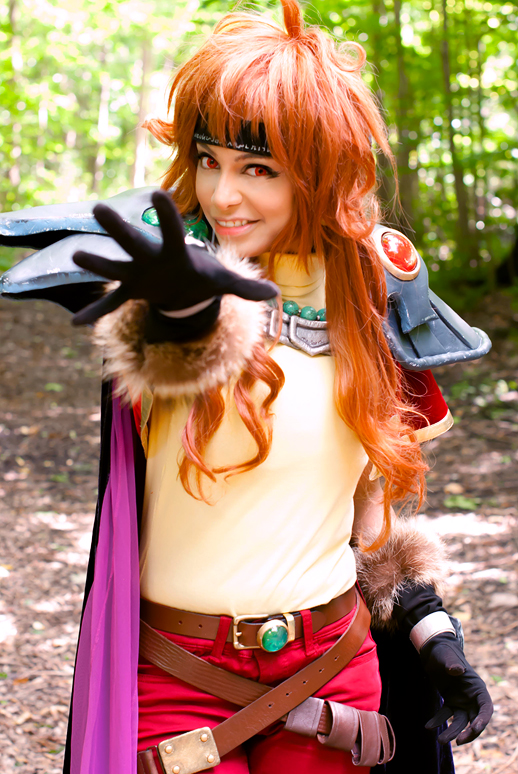
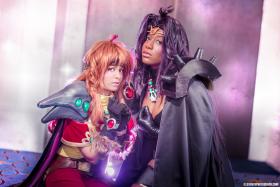
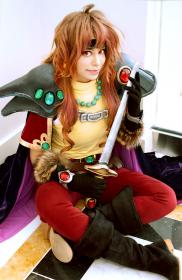
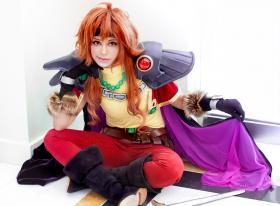
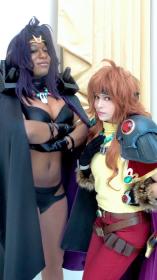
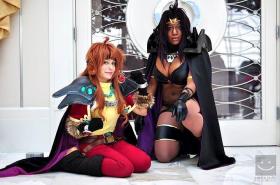
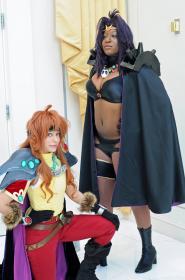
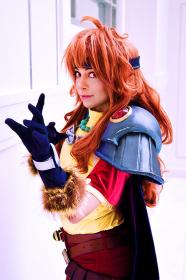
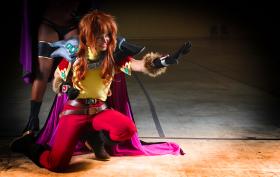
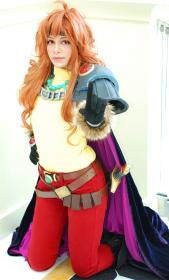
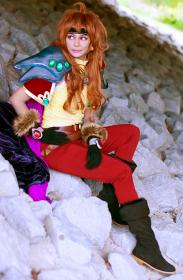
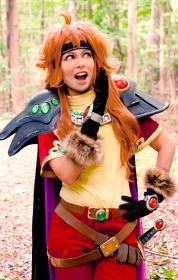
Cosplayer QuantumDestiny > Costume of Lina Inverse (Slayers)
- Most Recent Photo
- 09-30-2014
- Series
- Slayers
- Character
- Lina Inverse
- Special Variation:
- OVA
- Year Completed:
- 2014
- Construction Difficulty:
- Costume worn at:
- Katsucon 2014
About this Costume
- Construction Details:
-
The wig is made from Arda-Wig brand (Luthien, Ferrari, 1 curly clip) in Warm Light Brown. This colour looks really orange on my head. Even though I was going for a more brown tone I think I like the effect. I started out with just the Luthien and curly clip – using straightened curly clip fiber to fill out the bangs – but after doing that I found that I wanted more volume at the neck. I was too lazy to do any kind of volume increasing styling, so I ordered the Ferrari and took it apart; hot gluing the tracks in to get all the layering effects. I didn’t end up using all the fiber.
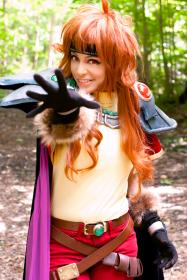
Gloves were some vintage micro suede that I got from ebay and edited; I took in the forearms and thumbs so they fit me and I airbrushed it all to black (the original colour was dark brown). The fur trim was added on by hand. Fur was harvested off a thrift winter hood.
Wrist amulets are craft foam and worbla with the gems set inside. Worbla was primed with layers of gesso which was then sanded. A few layers of mod podge went on, and then painting. Straps were strips of EZ felt with silver leather machine sewn on top. I threaded the straps through a molded slot in the back of the amulet. They hold closed by velcro.
I cast all the resin gems and painted the backs myself. I sprayed a thick coat of gloss spray on them for extra shine/clarity. Lina’s gems on this outfit are red and teal/green depending on the ref. I wanted them to sort of match my necklace, so I went with a teal.
The necklace was made from turquoise beads and findings I got in the Toronto fabric district. I went for a manga art style look when I put it together.
Yellow turtleneck shirt was sewn by me out of jersey fabric. I lined the shoulders with thick stretch white fabric. Boots were from ebay. They were originally a light brown so I airbrushed them to black. I stuck a 1.5” heightening insert into them to give me the hidden effect of wearing heels. I bought a pair of “jeggings” from the mall (American Eagle Outfitters) for the red jeans. The bandana was sewn from some faux suede, cut on the bias, pressed and stitched. There are snaps that hold it closed which get hidden by the wig bangs. Runes are painted on with silver paint pen.
Belts were all thrift store finds. They were really scratched and different colours, so I airbrushed them to match a bit better. The decals were made from scraps of brown leathers that I had in my bins. The buckle was formed with craft foam/worbla, metal studs, primed and painted gold.
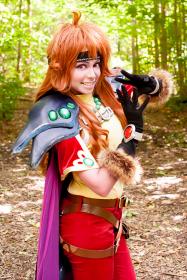
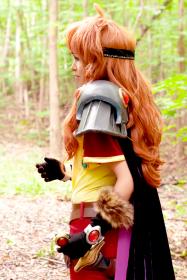
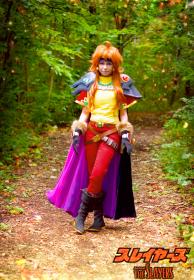
Shoulder Pauldrons– molded from worbla. Primed with many layers of gesso and sanded smooth with a dremel and by hand...
The reference pictures for the pauldrons change from image to image. I mixed the styles a bit to get one I liked best. Painted with acrylics and then sealed with a matte spray. The ‘rough’ edges and scratch marks on the armor are intentional... it looked strange to leave them pristine. Some runes and things were painted on for extra effect. Inside is lined with foam and black faux fur for comfort. These took the longest time to make out of everything else on the costume. I worked on them on and off for 3 weeks. The harness is made from strips of leather. It buckles in the back under the cape (which I get help being strapped in & out of)
The front silver “chain” looking pieces are made from stiffened felt and craft foam. They were covered with silver leather and then dry brushed with paint for depth & antiquing. The pieces are all stacked and hot glued down onto a strip of leather. The ends of the leather strip have Velcro sewn on which line up with strips of Velcro hidden on the inside of the pauldrons.
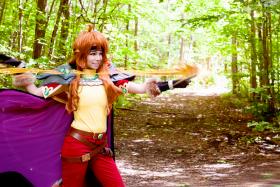
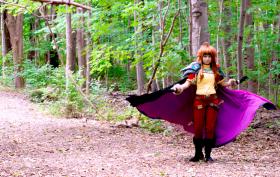
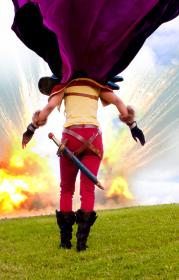
The cape is a ¾ circle cape made from blackberry colour rayon velvet. I lined it with a magenta mesh fabric. Both of these fabrics were f*ckin horrible to lay flat and cut evenly. So my cape is rather rustic OTL.
The capelet is made from a red stretch velvet and stretch non-fray gold fabric that I got during an xmas sale. It’s approximately a ½ circle with interfacing on the edges and the gold trim sewed on. The gem gold decal was interfaced, topstitched for decoration, and then heat & bonded on. The gems were backed with the same fabric and then hot glued into place.
The cape and the capelet are stitched together at the neckline and have installed loops which the pauldron harness threads through in order to hold it all on.
Sword is built over a Halloween toy sword. Worbla was used to remodel the hilt. Sheath was done the same way. Primed everything with thick layers of gesso. Sanded with a dremel and hand sanding. Painted with acrylics, added scratches, antiquing, gems, etc. Sealed with matte spray. The sheath is stitched/glued into position on the belt on so that it won’t hit the back of my knees when I walk.
Earrings were table tennis balls with clip-on fixings glued on, and painted gold. Red contact lenses were vampire red from clearlycontacts.ca. I went with those because they are the only type which shows up on my dark eyes in photographs and they don’t hurt my eyes after a few days of wear. Flashing LED jelly rings were from glowsource.com.
- Personal Thoughts:
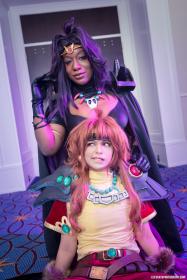
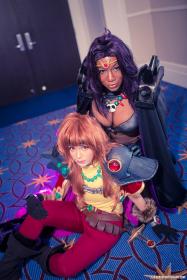
- Was a lot more work than it looked like. Naga wig also styled by me for ChibiTifa
Add a Comment
Photos
-
Photo 1
 0
0  847
847 -
Photo 2
 0 411
0 411 -
Photo 3
 0 539
0 539 -
Photo 4
 0 835
0 835 -
Photo 5
 0 502
0 502 -
Photo 6
 0 615
0 615 -
Photo 7
 2 711
2 711 -
Photo 8
 0 462
0 462 -
Photo 9
 0 714
0 714 -
Photo 10
 0 449
0 449 -
Photo 11
 0 536
0 536 -
Photo 12
 1 513
1 513 -
Photo 13
 0 473
0 473 -
Photo 14
 0 382
0 382 -
Photo 15
 0 439
0 439 -
Photo 16
 0 407
0 407 -
Photo 17
 0 596
0 596 -
Photo 18
 0 406
0 406 -
Photo 19
 1 386
1 386 -
Photo 20
 0 443
0 443 -
Photo 21
 0 731
0 731 -
Photo 22
 0 417
0 417
-
 1099102 VisitorsAcy's Pick: 03/2014
 -
- Cosplayer Info
- Costumes Worn
- Costumes Made
- Props
- Wigs
- Favorites
- Convention History


Sorry, you must be a registered user of and logged in to view and add comments. Either log in or register now!